How to make a BEE Habitat with Phragmites and a Shipping Tube!
- Shelly Kelly

- May 30, 2019
- 4 min read
Updated: Jun 2, 2019

Earth Blessings Everyone!!!
The Bees!!! We have to help the bees! Screams everyone from their roof tops. But how? I don't know how to 'keep' bees! Not every bee is created equal, actually there are more than 36,000 different species of bees, and a lot of those are not honey bees.
These habitats are for 'thooooose' bees. You know the ones that stay single and are never really ready to mingle, other than to reproduce and lay their eggs. Lay eggs where? you ask. HERE, in your brand new Bee habitat.
The species of bees we're helping out today are actually better pollinators than their honey making cousins. They aren't workers, so they like to roll around in all the flowers, hanging out and doing their pollinating thing. It gets hard for them though, when they don't have a home, so let's make one for em!
What you'll need:
Phragmites grass
Shipping tube and cover
A small hand saw
Paint or Paint Markers
Bees Wax Sealant (No worries, I'll tell you how to make some!)

So where do we start?
-In ditches and wet lands.
This is a very invasive grass known as Phragmites. Once you learn it, you will see it literally EVERYWHERE. I have my five year old yelling from the car every time she sees it now.
It's not a good invasive though (yes there are some good invasive plants!) It's choking out our native Cat Tail, so any cutting you can do can help save the Cat Tail, (which. BTW is delicious and deserves it's own post)

Phragmites is very tall and generally grows right along ditches and wet land areas, literally anywhere where cat tails grow. It has a fluffy, grassy little top and a hollow shaft.
The hollow shaft is what will work for our Bee Habitats.
After you've pick/cut your fill, you're going to need to saw them about 6-8 inches long. We use a saw as to keep the opening nice and circular, using scissors can pinch the opening shut. You want them long enough so the Bees have room to lay their eggs. A lot of the habitats I've seen sold in the stores have really short tubes and I can't imagine them working well. But alas, you're here to make yours for free anyway.

After you've collected your Phragmites, it's time to pull out your shipping tube. If you don't have one lying around, a paper towel tube will work or any post office or shipping center will have one for cheap. (toilet paper tubes are too short for this project though) You can make about three habitats out of one shipping tube.

You're going to want to cut/saw your tube to about 7-8inches. You can see my very crude pen line and how accurately I cut this one. Haha. Perfection not needed here!

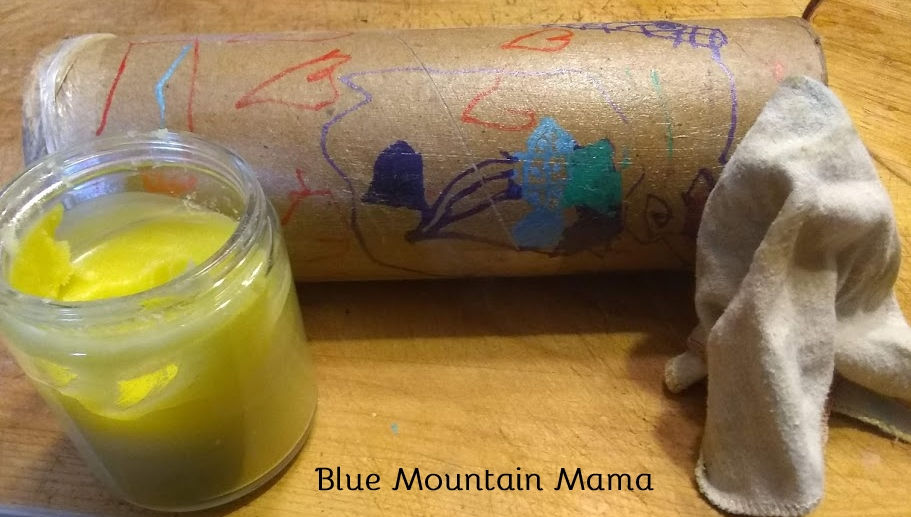
Then have your little one (or you!!) decorate it. I use paint markers, they're permanent and easy to use for my five year old. You can use any craft acrylic paint or even permanent markers.

After you're satisfied with the artistic creation of your habitat, it's time to seal it. Take a rag and rub about a tablespoon of bees wax sealant ALL OVER YOUR TUBE! Like the inside top lip too. Be generous, this is what will keep your habitat pretty and sturdy in the rain. Let the first layer dry a little and then apply a second layer. If you don't have a bees wax sealant already, keep scrolling down, I've got the recipe for you.

Now you stuff it with the Phragmites! Try to fit as many Phragmites tubes in your shipping tube as you possibly can, we don't want to leave room for predators to get in there! Remember to stick on the shipping tube cap to one end, otherwise all your Phragmites will simply fall out.
And you're done! That was it, and you've now created a whole condo set up for all our single bees. They will love it, your plants will love it and we're all happy with the bees again.
I stick ours right in our garden fence, giving the bees some access to food and a home!
Beeswax Sealant Recipe

What you'll need:
Bees wax
Olive Oil
Jar

Start by putting your bees wax in a double boiler type set up (I just put my measuring cup in a pan of boiling water)
I like to boil my wax first because you're going to be measuring 3x the amount of oil to it and it's way easier to just multiply 3 to the amount of melted wax.
For instance, this batch of wax melted at 1/4c, so I added 3/4 c of olive oil to my measuring cup when the wax was completely melted.
So however much melted bees wax you have, add 3x as much Olive Oil.

Let them both melt together, I still had a couple little chunks of bees wax that needed to melt before I put them in my jar

Then just pour into a jar and let set.

This is what it should look like when it's ready to use. Depending on temp and humidity it should set within an hour.
If you're getting impatient, you can stick it in the fridge for a little bit to speed the process up.


Comments